How to Customize Journal
Bevel lets you customize your Journal by choosing which entries to track, adjusting thresholds, pinning frequently used items, and creating your own custom entries.
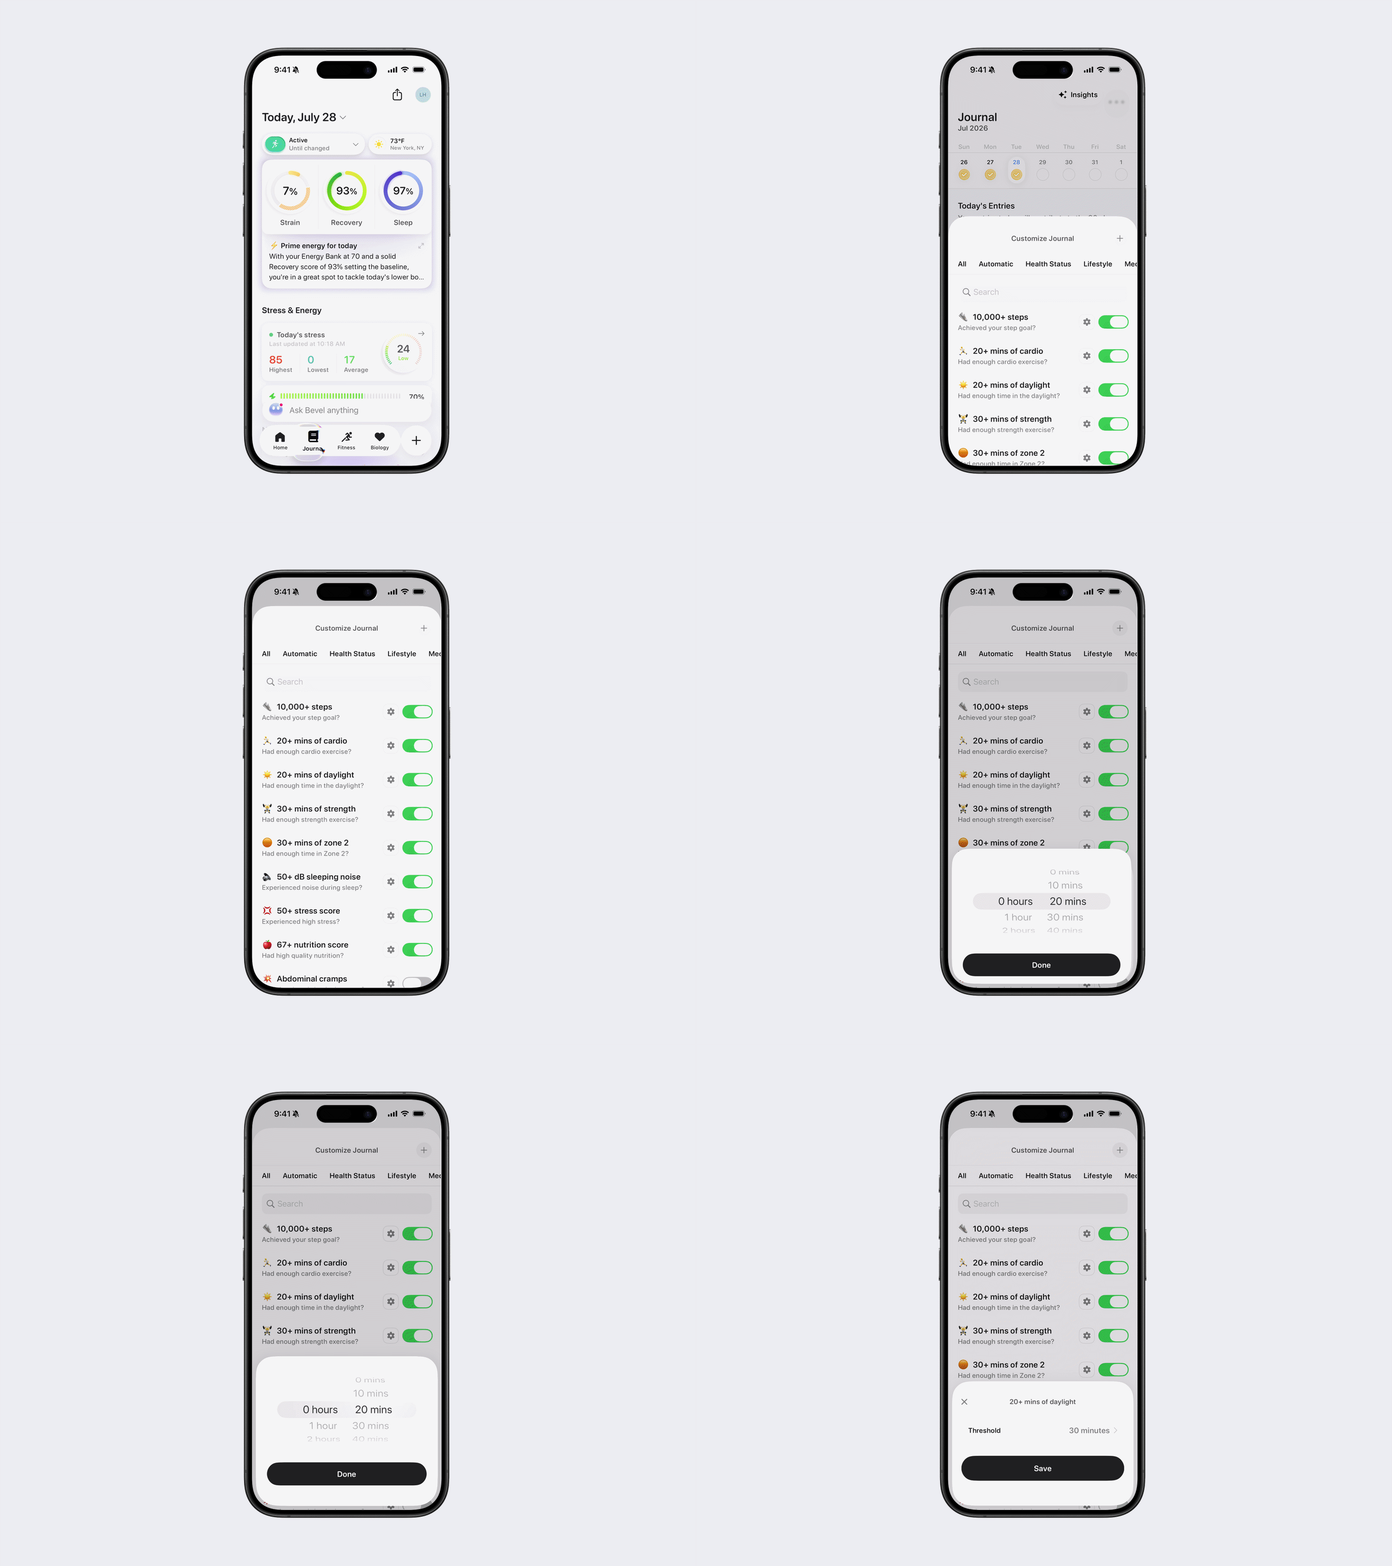
Customize your Journal
Open Bevel.
Tap the Journal tab.
Tap the three dots (...) in the top-right corner.
Tap Customize Journal.
Filter Journal entries
At the top of the page, you can filter Journal entries by category:
All
Automatic
Health Status
Lifestyle
Medication
Nutrition
Reproductive Health
Sleep
Supplement
Wellness
Custom
Enable or disable Journal entries
To show or hide a Journal entry:
Find the entry you want.
Tap the toggle next to it to enable or disable it.
Change a Journal threshold
Some Journal entries use thresholds that you can customize.
Tap the Settings icon next to the Journal entry.
Adjust the threshold to your preferred value.
For example, you can change a 10,000+ Steps entry to 5,000+ Steps.
Change a Tracking Intent
Some Journal entries support customizable tracking intents.
Tap the Settings icon next to the Journal entry.
Choose a Tracking Intent:
Target: Aim to meet or exceed your goal.
Limit: Aim to stay at or below your limit.
None: No intent.
If you select:
Daily Limit: Enter the amount you want to stay at or below.
Daily Target: Enter the amount you want to meet or exceed.
Pin Journal entries
To keep an entry at the top of your Journal:
Tap the Settings icon next to the entry.
Tap the Pin icon.
Pinned entries will always appear at the top of your Journal tab.
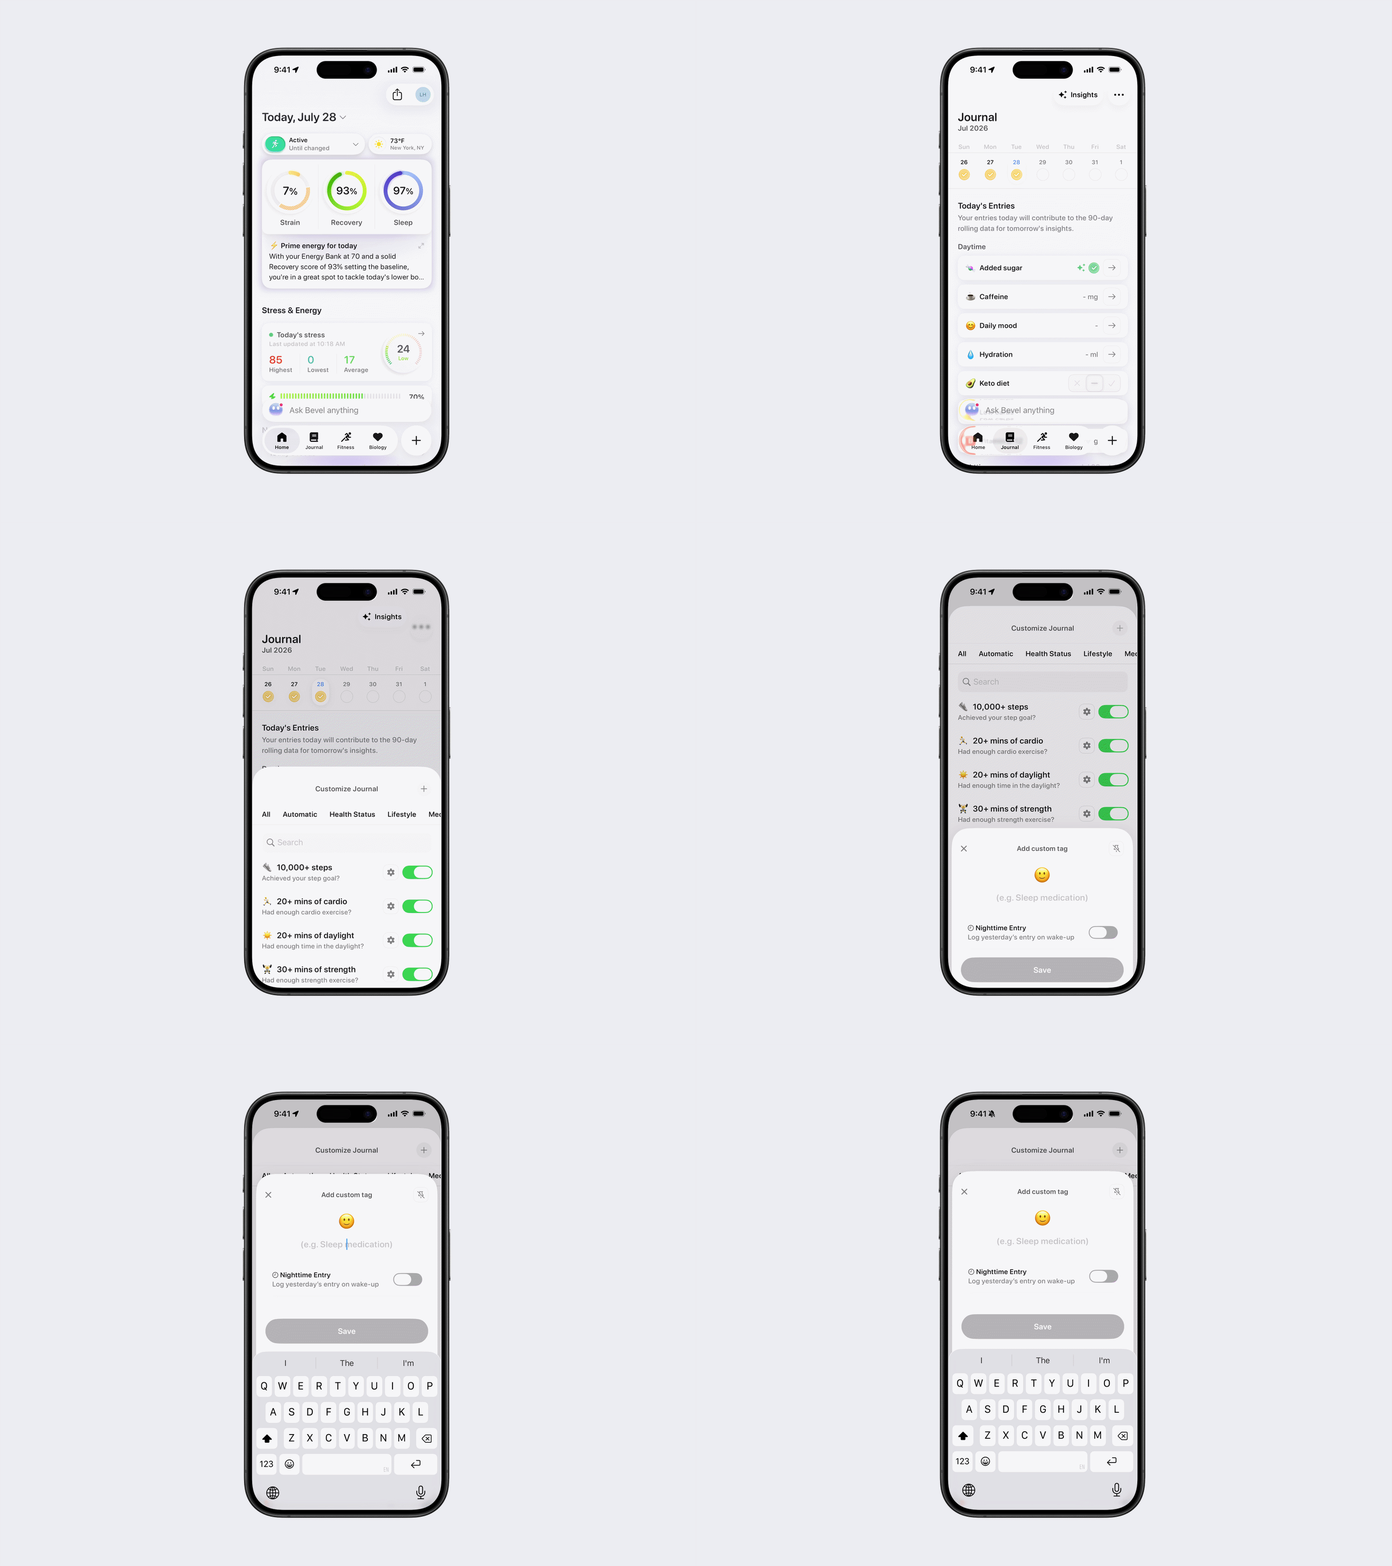
Create a custom Journal entry
You can also create your own Journal entries.
Open Customize Journal.
Tap the + button in the top-right corner.
Enter a name and emoji for your Journal entry.
Choose whether it should be a Nighttime Entry, which prompts you to log the previous day's entry when you wake up.
(Optional) Tap the Pin icon to keep it at the top of your Journal.
Save the entry.
Your custom Journal entry will then appear in your Journal and can be logged just like any other supported entry.